
You know that snack you keep thinking about after it’s already gone? The one that disappears in five minutes and leaves a little trail of salt and melted chocolate behind? That’s what these chocolate stuffed pretzel bites are.
It all started as a happy accident. I was making soft pretzel dough for something else, spotted a bar of dark chocolate on the counter, and paused. A quick fold, a pinch of flaky salt, and a hot oven later, something special came out. Crunchy outside, gooey inside, with just the right amount of chew. These were not just good. They were borderline addictive.
Chocolate and pretzels make a perfect pair. One brings sweetness, the other brings that salty, golden-baked finish. Together, they balance in the best way.
If you’ve ever wished your favorite chocolate came wrapped in a warm, soft shell with a slight crunch, this is your moment.

What Makes Chocolate Stuffed Pretzel Bites So Addictive
There’s something about that sweet and salty combo that never gets old. When chocolate melts inside warm, golden pretzel dough, it becomes a snack that’s impossible to forget. Every bite brings contrast the soft interior, the hint of chew, the crisp crust, and that hit of creamy chocolate in the middle.
Why Chocolate and Pretzels Belong Together
Pretzels bring a salty, slightly yeasty flavor that balances perfectly with chocolate. The dough has just enough substance to hold up to the filling without overpowering it. Chocolate brings the richness. Whether you choose milk, dark, or even a hazelnut variation, the pairing always works.
It’s this balance of flavor and texture that makes chocolate stuffed pretzel bites more than just a novelty. They satisfy cravings on both ends of the spectrum.
That Perfect Texture Balance
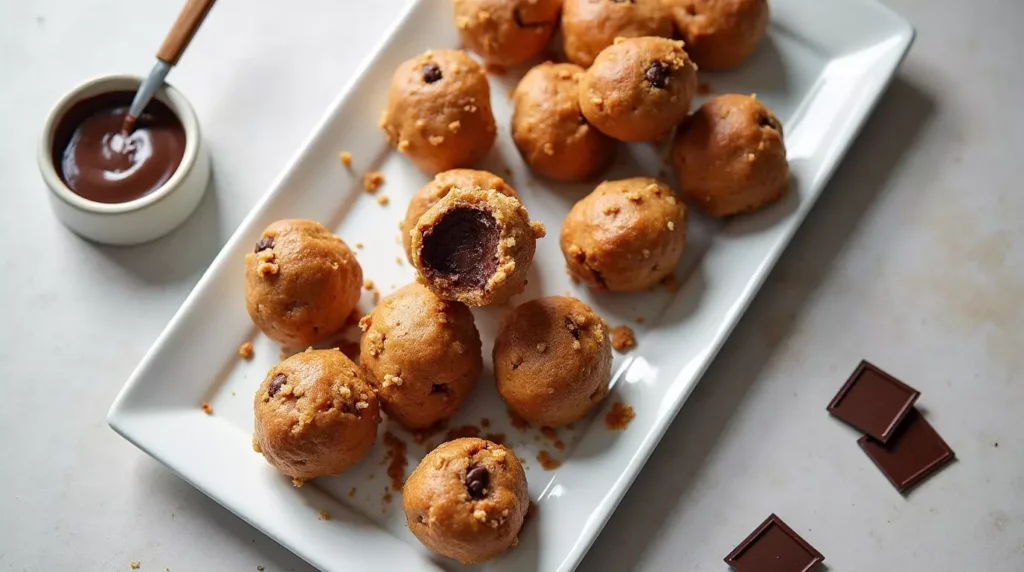
The goal here is contrast. A crisp, golden-baked exterior gives way to a soft, slightly chewy center. Inside that center is a bit of chocolate that has just melted enough to feel like a reward.
They’re light enough to eat several, rich enough to feel like a treat, and just small enough to grab one more without thinking twice.
When Crunch Meets Melt
This is what makes these bites so satisfying. The bite starts with a light crunch from the salted crust, then immediately moves into the warmth of the filling. Chocolate spreads just a little, coats the inside of the pretzel, and lingers in the best way. If you’re into desserts that hit that same rich center, these Red Velvet Oreo Brownies bring a fudgy, bold flavor that pairs just as perfectly with coffee
It’s not messy. It’s not over-the-top. It’s just enough.
Getting the Pretzel Dough Just Right
The dough is where it all begins. If your pretzel base is off, the whole bite loses its charm. The good news? You don’t need to be a baker to get this right. With a few tips and a little patience, your dough can go from basic to bakery-worthy.
Soft on the Inside, Golden on the Outside
You want a dough that’s soft and pillowy inside, but firm enough to hold its shape. That starts with the right ratio of flour to liquid and a good stretch of kneading to build strength.
Once baked, the outside should develop a light crust with that signature pretzel sheen. The inside stays soft and slightly chewy, giving the perfect base for melted chocolate to shine.
Chocolate Stuffed Pretzel Bites
Ingredients
Main Ingredients
- 1 can refrigerated pizza dough
- 0.5 cup chocolate chips or chunks
- 0.25 cup baking soda
- 4 cups water for boiling
- 1 egg beaten, for egg wash
- coarse salt for topping
Instructions
- Preheat oven to 425°F (220°C) and line a baking sheet with parchment paper.
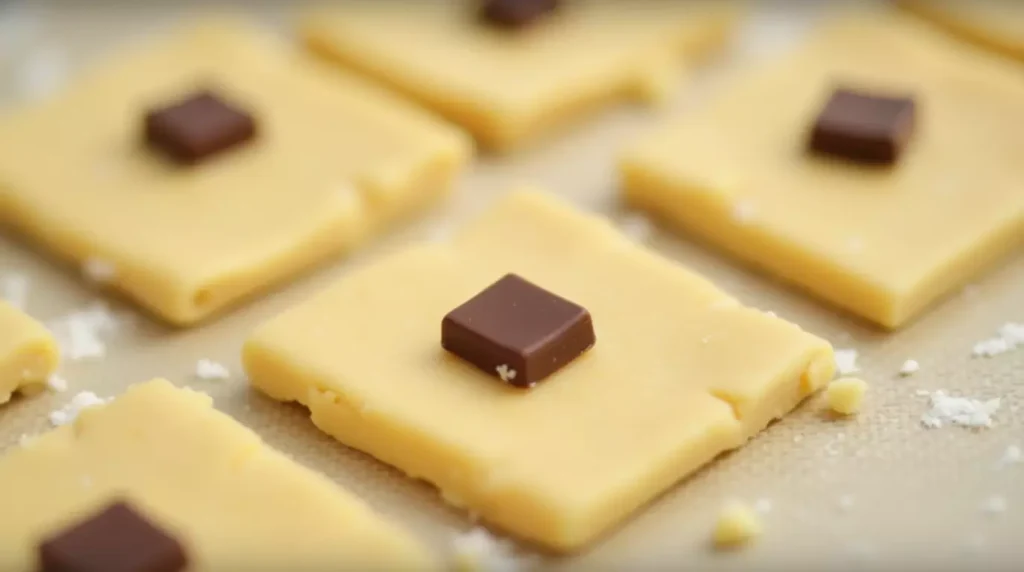
- Cut pizza dough into 1.5-inch squares and place a few chocolate chips in the center of each.
- Fold and pinch the dough around the chocolate to seal into a ball.
- Bring water and baking soda to a boil; carefully drop each dough ball in for 20 seconds, then remove.
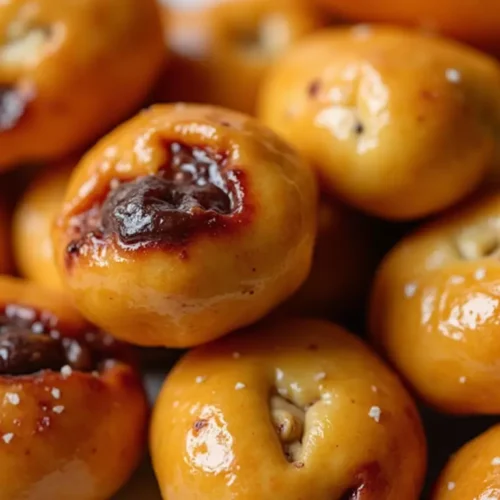
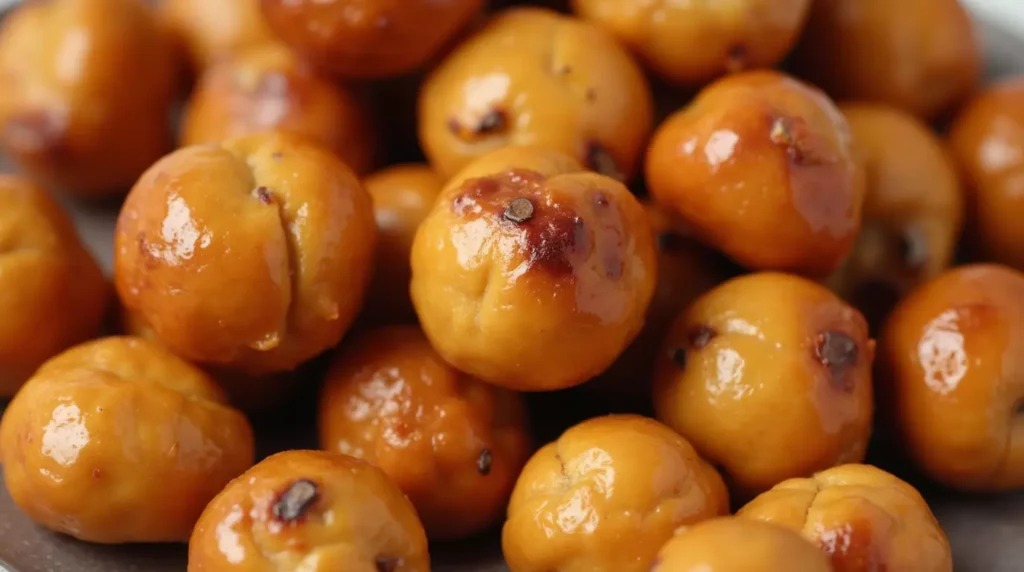
- Place on baking sheet, brush with egg wash, and sprinkle with coarse salt.
- Bake for 12–15 minutes or until golden brown. Cool slightly before serving.
Notes
The Dough That Holds the Magic
This isn’t pizza dough and it’s not quite bread either. Pretzel dough has just enough sugar and butter to enrich the texture without turning it sweet. The goal is a dough that’s flexible, easy to roll, and seals well around your chocolate pieces.
Letting it rest after kneading is key. Give it time to rise, and it will be much easier to shape without tearing.
Tips for Kneading, Proofing, and Rolling
Knead until the dough feels smooth and elastic. It should bounce back slightly when pressed. A rest time of about an hour lets it double in size and makes shaping much easier.
When rolling and cutting, aim for pieces big enough to wrap fully around your chocolate. A proper seal prevents leaks and keeps every bite neat and filled.
Boiling Before Baking Is a Must
This quick step gives pretzels their classic flavor and texture. A brief dip in baking soda water helps the dough form its signature crust. It also gives that golden finish and a bit of snap on the outside.
Skipping this step would make the bites taste more like rolls than real pretzels. It’s quick, simple, and absolutely worth it.
Choosing and Stuffing the Chocolate
This is where the snack turns into a treat. The right chocolate makes all the difference, and so does the way you wrap it. A little care here ensures every bite has that perfect balance of gooey filling and golden crust.
Best Chocolate for Melting Inside
Not all chocolate melts the same. For the best results, use chocolate bars or chunks rather than chips. Chocolate chips are designed to hold their shape, which means less gooey center. Go for a good-quality dark or milk chocolate bar and cut it into small cubes.
You can also try flavored varieties. Think sea salt caramel, hazelnut, or even a square of peanut butter-stuffed chocolate if you’re feeling adventurous.
How to Wrap Without Leaking
Once your dough is rolled and cut into squares, place the chocolate in the center and fold the dough over it completely. Pinch the seams tightly and make sure there are no openings. The goal is to trap the chocolate inside so it melts evenly without seeping out during baking.
A light brush of water around the edge before sealing can help the dough stick to itself and create a cleaner pocket.
Salted or Unsalted Butter Finish?
Right after baking, brushing the pretzel bites with melted butter adds flavor and helps hold any added salt or sugar. If you want a more savory finish, go for salted butter and a sprinkle of flaky salt.
For a sweeter bite, unsalted butter with a dusting of cinnamon sugar or even a cocoa-sugar blend works beautifully. It all depends on the final flavor you want your chocolate filled pretzel snack to carry.
Baking Like a Pro
Once your bites are stuffed and sealed, the final step is baking them to golden, irresistible perfection. This is where timing, temperature, and a few final touches can turn a good batch into a great one.
Oven Temperature and Timing
A hot oven is key. Bake your pretzel bites at around 425°F. This high temperature ensures the outside browns quickly while the inside stays soft and the chocolate melts just enough. Keep an eye on them starting around the ten-minute mark. They should be a deep golden brown with slight puffing.
If you’re using different sizes or thicker dough, you may need to adjust the time slightly. Always check a center one to make sure it’s cooked through but still soft inside.
How to Avoid Dry Spots
To keep your bites from drying out, don’t overbake. As soon as they’re golden, they’re ready. Leaving them in for just a few minutes too long can turn that lovely soft center into a dry crumb.
Brushing them with butter right out of the oven also helps lock in moisture and keeps the crust from getting too firm.
Finishing Touches That Pop
Once your bites are baked and brushed, you can add a final flourish. A pinch of flaky salt brings out the chocolate even more. A light dusting of powdered sugar turns them into a sweet snack. You can even drizzle with melted chocolate or caramel if you’re going for something more dessert-like.
The key is to add just enough to make them pop without covering up that perfect crunch-to-melt ratio.
Serving Ideas and Snack Pairings
These chocolate stuffed pretzel bites are incredibly versatile. They can be dressed up for a party platter or kept simple for a cozy snack night at home. However you serve them, they’ll disappear fast.
Party Snack Board Addition
Add them to a sweet and salty snack board. Pair with fruits like strawberries and grapes, a few wedges of soft cheese, and small bowls of nuts or candied pecans. These bites add texture, richness, and color to any spread without overpowering the rest.
They hold well at room temperature, so they’re great for serving in large batches where guests can help themselves.
Kid-Friendly Treat with a Grown-Up Twist
Kids love anything with melted chocolate, and these bites hit that mark. But adults will appreciate the deep flavor of the pretzel and the soft crunch of the crust. If you’re making them for younger snackers, try using milk chocolate and skipping the salt topping.
For grown-ups, dark chocolate or a richer filling like chocolate hazelnut or espresso chocolate takes them up a notch. Serve alongside something savory like Crack Chicken Strips for a snack platter that satisfies every craving.
Make-Ahead and Reheat Tips
These bites can be made ahead, stored in an airtight container, and reheated easily. A quick warm-up in the oven brings back the softness and melts the chocolate again. Just cover loosely with foil and bake at a low temperature for a few minutes.
If you’re planning to freeze them, wrap in parchment and store in a zip bag. Reheat from frozen at 350°F until warm throughout. Pair a few warmed bites with a refreshing Blueberry Pineapple Smoothie for a sweet and balanced treat.
Frequently Asked Questions
How far in advance can I make chocolate covered pretzels for an event?
Chocolate covered pretzels can be made up to two weeks in advance if stored properly. Keep them in an airtight container at room temperature, away from heat and moisture. For events, it’s best to make them three to five days ahead so they stay fresh and crisp. Unlike chocolate stuffed pretzel bites, which are best warm, dipped pretzels hold up well for longer periods.
What kind of chocolate do you use for pretzels?
High-quality chocolate bars or melting wafers work best for coating or stuffing pretzels. For stuffed versions like homemade chocolate pretzel bites, choose dark or milk chocolate that melts easily and pairs well with the salty dough. Avoid chocolate chips if you’re after a smooth, gooey texture inside.
What is the best way to dip pretzel rods in chocolate?
Melt your chocolate in a tall, narrow glass for easy dipping. Hold the pretzel rod halfway and dip at an angle for a more even coat. Tap off any excess, then place the dipped pretzel on a parchment-lined tray to set. For a chocolate filled pretzel snack, make sure the chocolate sets completely before serving or packaging.
How do you keep soft pretzel bites warm for a party?
To keep soft pretzel bites warm, wrap them in foil and store in a low-temperature oven (around 200°F) until ready to serve. If you’ve made chocolate stuffed pretzel bites, reheat gently to keep the centers melty. Avoid overheating so the dough stays soft and the chocolate doesn’t harden.
Final Thoughts
Chocolate stuffed pretzel bites are the kind of snack that checks all the boxes. Sweet, salty, soft, and crunchy all at once. They feel like something you’d grab from a gourmet bakery, yet they come together easily in your own kitchen.
They’re perfect for sharing, ideal for snacking, and satisfying enough to steal the show on any dessert table. With a handful of pantry staples and a little time, you can create something that feels indulgent without being complicated.
So if you’re craving something that’s both familiar and just a little extra, this is it. Bake a batch, share them (or don’t), and let each bite remind you why homemade snacks always win. For something creamy and elegant to follow, try this Pistachio Panna Cotta it’s smooth, nutty, and just as impressive.